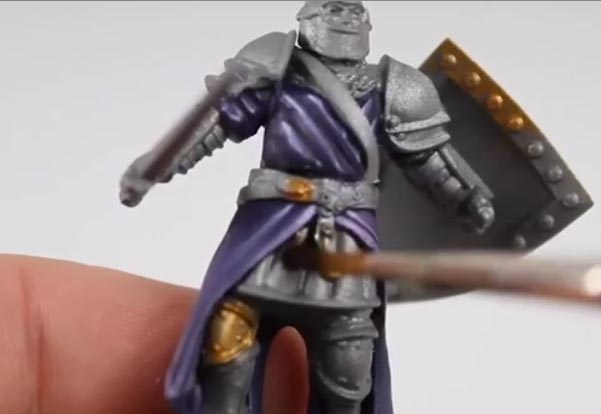
Are you an action figure lover? Or perhaps someone gifted you with a collection of figures but don’t know what to do with the ugly ones? As a child I had many action figures that got the paint scraped off of them from playing with them outside on the driveway, but some new paint made them custom and better than new.
Well, if you’re looking to bring your favorite character to life, it’s easy. You just need the best paint for action figures from the market.
However, even with the right paint, you cannot create something outstanding if you don’t know how to paint figures.
So, in this article, we’re going to provide you with a step-by-step guide on how to paint action figures. Read on and we will set you on the right path to painting the figures.
Table of Contents
Steps on How to Paint Action Figures & The Tools Needed
Before we provide you with a guide on to correctly paint figures, let’s first discuss the tools you’ll need to get started. They include:
Sandpaper – This should be very fine as a normal one can leave big noticeable scratches on the figure.
Paint brushes – You will need brushes of different sizes, including one with fine bristles.
Acrylic paints – It’s not advisable to use enamel paints because they will leave your project tacky.
Water – Used for cleaning the acrylic paint and thinning the paint.
Method of Painting an Action Figures
Now that you know what tools you will need to paint your figures, here are instructions on how to go about it.
Step 1: Preparation
The first step is to prepare your figure. It is not advisable to paint the action figure right out of the box. First, you will need to wash it with warm soapy water. You can also use a soft nail brush to clean between the joints.
You see, the figure is usually made with oily lubrication on the plastic to prevent the joints from locking up. So, washing the figure helps remove the lubrication because it may prevent the paint from sticking.
Step 2: Sanding
Next up, you will need to the figure so it looks seamless. Simply find all the seams where the halves of the figure were glued together. Ideally, the seams usually run the full length of the action figure from head to toe down its sides.
By the time you are done sanding, your action figure will be looking like a model rather than an ugly toy.
Step 3: Primer the Figure
Your next step is to primer your action figure. However, this step can be skipped and simply paint over the factory paint. If you chose to primer the figure, you will need high-quality automotive primer paint that won’t make plastic tacky.
Of course, you will need to prime the entire figure. Just make sure to use thin light coats and thick ones can gob-up and leave streaks. Additionally, you should start by painting some of the hardest-to-reach areas such as under the arms.
Lastly, place the figure in a way that you can paint everywhere. For instance, you could put it with the arms in the air.
Step 4: Start Painting
After priming, the first step in painting an action figure is to apply a base coat. And just like priming, you should start by painting hard-to-reach areas. More importantly, make sure to pose the figure in a way that is easy to paint the whole of it.
Start by painting the solid colors that make up the larger sections of the figure. However, the base coat should not be too dark because the washes would not show up. So, make sure to use very light colors for the base coat.
For example, you can paint a light color like yellow on dark plastic. However, you will need to use a white background color.
Step 5: Apply a Wash
Basically, a wash is thinned down paint designed to seep into cracks and low points on a figure’s surface when applied. Simply put, it helps create shadows.
Ideally, the wash formula comprises two drops of water per one drop of paint. However, this may differ based on the thickness of the paint. Therefore, you must experiment and ensure the formula has the same consistency as that of milk.
Next, dip your brush in and paint a light coat as you watch how the wash seeps on the paint. If it beads up on the base coat, then you should make it thicker. And if it covers the base coat completely, you should dilute it with more water.
What you need is for the wash to gently darken the base coat and seep into all the crevices. Then, allow the wash to dry until the true shade appears on your action figure.
Step 6: Time for Highlights
One of the best techniques you can use to give dark surface highlights is ‘dry brushing’. It is basically the opposite of a wash and is very simple. Ideally, you just add a lighter shade to your action figure.
Start by choosing a lighter color than that of your base coat. Next, dip your brush in and wipe the paint off the brush using a clean napkin. The brush should look nearly dry. Then, run the brush back and forth over the figure like you were dusting it.
Similar to a wash, you can always use different colors with dry brushing to stimulate different lighting. It’s a matter of finding your personal style.
Step 7: Paint all the Details
The last step on how to paint action figures involves painting all the details that make a figure stand out. You can start by outlining using a thinned-down black paint to give your figure a better definition.
Generally, you should outline the sections of the mouth, eyes, boots, gloves, and belt. Make sure to go slow and steady with your hand. Also, your arm should rest on your workstation.
Editor’s Note: Check out our Buying Guide For The 7 Best Paint For Baby Crib
Additional Painting Tips
Below are extra tips that are worth keeping in mind when you want to paint action figures. Check them out before you start your project.
Apply multiple thin coats
If you want your finished product to have a smooth look, always apply multiple thin coats rather than one thick coat. It also ensures superior durability. You can thin your paint by adding a few drops of distilled water.
Never buy gold paint
You can make high-quality metallic gold paint than the ones sold on the shelf. To do this, get clear yellow paint. Then, base coat the action figure silver and paint the yellow paint over the base coat.
Use rubbing alcohol in a wash
You should add a small drop of rubbing alcohol to your wash formula. Ideally, it helps the wash to stick better to the figure by breaking the surface tension of the wash.
Stir your paints thoroughly
Every time you’re using the paints, make sure to stir them properly using the other end of your paintbrush. Just avoid shaking them before stirring if you can see where the paints have separated. Otherwise, you could end up with bubbles on your custom.
Use super glue to protect the joints
Sometimes, the paint may wear off from the surface where the plastic rubs together or between a joint. To avoid this, you can apply super glue onto the surface using a toothpick. Just make sure the glue does not spread into any joints.
Final Words
So, there go the steps on how to paint action figures. It does not matter whether you just love to paint or are an action figure enthusiast. The above tips will help you achieve the ultimate in customized figures.
Related Posts:


